Snowflake Alphabet Tutorial
One of the most fun things to do in PSP is colouring Alphabets and Dingbats. I already have a tutorial about that HERE, but when I found this cute snowflake font, I wanted to do something with it, so here it is 🙂 It’s actually two fonts in one: lower case: snowflakes, upper case: snowmen

First: download the Snowflake font at fontspace
To see the details in this tutorial, click on the images, and use your back button to come back here 🙂
Open a new file, go large, that’ll give you some space to work with.
Pick a background colour and make sure your foreground colour is turned off
Select the font in a large size – I think I used 300 points for this one
Type the letter a (lower case)
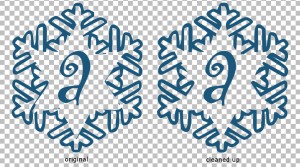
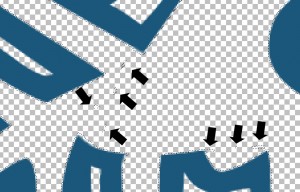
After I typed the letter, I noticed it needed a clean up. There were lines where I didn’t want them and the lines of the snowflake weren’t completely closed, so I couldn’t select the inside of the snowflake.
Look at this example
After the clean up: select the inside of the snowflake to check if there are any stray pixels left. In my case there were some, so I had to delete those first.
These are the settings I used for the eraser, but whatever works for you is fine!
(My PSP is in Dutch, but you’ll figure it out by looking at the image :D)
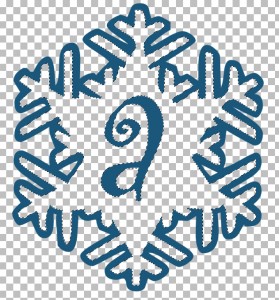
Now the image is ready to go.
Select the inside of the snowflake and don’t forget to select the inside of the letter as well (that goes for a, b, d etc. other letters obviously are fine)
With the marching ants selected: Add a new layer and move that to the bottom (I always put background colours on a new layer, it’s easier if you want to change things and it makes a difference when you use effects!)
Flood fill with colour of your choice, in this case I used white.
Now comes the fun part. I’ll show you 3 different versions of the same image by using a different inside bevel.
First, in your layer palette, select (activate) the layer with the snowflake/letter image
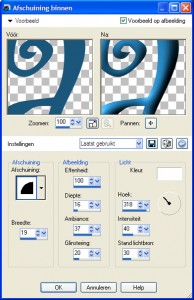
Go to: effect -> 3D effects -> inside bevel
These are the settings I used
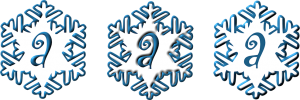
Here are the three snowflakes I made:
For the first snowflake I added the inner bevel only to the snowflake/letter layer
For the second snowflake I added the inner bevel first to the snowflake layer, then I clicked on the layer of the background colour and added the inner bevel with the same settings
For the third snowflake I first used the ‘undo’ button a few times until I got to the original coloured image, merged all layers and added the inner bevel to the merged image, again with the same settings
Different outcomes with the same settings, the number of outcomes with different settings are numerous. Just play around with your settings and use merged ánd unmerged layers to see which results you like best.
I hope this tutorial was useful to you. If you would like to have a complete coloured Snowflake Alphabet, please let me know by leaving a comment. It’s a lot of work, especially since the letters need to be cleaned up and I hate doing work for nothing :p
I would like a colored alphabet only if you have one already made, if you do not then that is ok, because I know at this time how busy people are.
Thank You so much
Happy Holidays